Well, the pineapple vinegar got poured into the compost this afternoon. Why? Well, with all the layers of cheesecloth to protect it, bugs still got inside it. EWWW!! I had little gnats inside the cover, happily getting fat off the brew.
I had a great "mother" on top of it and it was getting near the harvesting period as it had gone from clear, to murky, and then almost clear like the original recipe had stated would happen. When I opened the top, a few gnats flew out, so that was the immediate end of that experiment.
Next time, I'll skip the cheesecloth and instead use a flour sack towel to cover it, which is a much tighter weave than four layers of its recommended competitor. I'll wait until the spring to revive this experiment.
As far as the wild yeast goes, I tried making bread with it, but it didn't rise much. I did add a little bit of commercial yeast to the blend and it barely got to the top of the loaf pan, but it did have great flavor! I've tried making another wild yeast starter, and it seems to work better on warmer days (75+ degrees F) and cooler days result in a total flop, which isn't surprising since yeast in bread likes a warmer environment in which to grow and rise.
We did have a few warmer days here where I tried to make another batch, but in the end it still didn't work. I found trying to revive starter that was put in the fridge after successfully being capture didn't work for me (you're supposed to feed it equal amounts of water and flour), but mine never proofed a second time. What did happen was it grew mold before it got there!
So use the fresh captured stuff fairly quickly, but add in some extra commercial yeast if you want to make bread with it. I found making sour dough starter with commercial yeast easier and more predictable in cooler fall weather.
Chalk up another set of "FAILS" for me on this, but hey...that's how you learn. I'm not discouraged, but I'm going to have to wait until next spring when the fruit's fresh and the weather's warm enough to grow yeast to try again.
Showing posts with label vinegar. Show all posts
Showing posts with label vinegar. Show all posts
Monday, October 22, 2012

Thursday, October 11, 2012
Pineapple Vinegar Update
I must confess one thing wasn't mentioned in ANY of the recipes...this attracts gnats! I've set up gnat traps with great success, but it's annoying. The only really successful method I've found to deal with gnats is pouring kahlua in a shallow 6 ounce bowl and placing it on top of the half gallon jug. So far, the gnats haven't managed to get into the brew, but that's because I was smart enough to use four layers of cheese cloth in the beginning. It also works in my favor that the alcohol is in the open and sitting on top of the jar...one is easier to get at than the other, and gnats are lazy.
What's true to the original recipe, the vinegar has turned a bit brown and is cloudy, but it's actually starting to smell like vinegar. I'm not sure how much longer it'll be before the brew goes from brown to something that is clear and can be strained and bottled.
I'll have to try this again with some apples in the near future and see what kind of results I get. I'm also wondering if this works with any fruit, not just pineapple or apple.

Happy Eats! :)
Wednesday, October 3, 2012
Making Homemade Fruit Vinegar
I had to struggle with this concept for awhile before I decided to try it. Vinegar's so cheap and easy to pick up, but I'm always thinking along the lines of, "What if I couldn't get any vinegar?" Say you're running short of cash, or some disaster happens - what are you going to do? So here's another experiment just for the "Does it really work?!?" factor.
I recently saw on a video post a woman was using the skins from her pineapple to make vinegar, so I decided to do a little bit of research. Some recipes were a little vague, but I found this one to be quite useful, so I decided to run with it.
 Here's the pineapple I started with when I made the pineapple vodka mix, and it was super ripe.
 Once I had cut up the meat, I had the skins and top left over, so I began to cut up the pieces and pack them into a half gallon sized mason jar. There's actually a couple of tricks to this method: if you leave more meat on the peel, it'll stay near the bottom of the jar. If you're like me and you want to get as much of the meat into something else, those peels are going to be lighter, so place the lighter stuff at the bottom of the jar, and your heavier pieces at the top to keep everything from floating.
 I used filtered water and added a half cup of sugar to the water and peels. At this point, your instinct is to put a lid on the jar. NOPE...you're going to take advantage of the fermentation process, which means you need a fabric cover.

Happy Eats!
UPDATE:
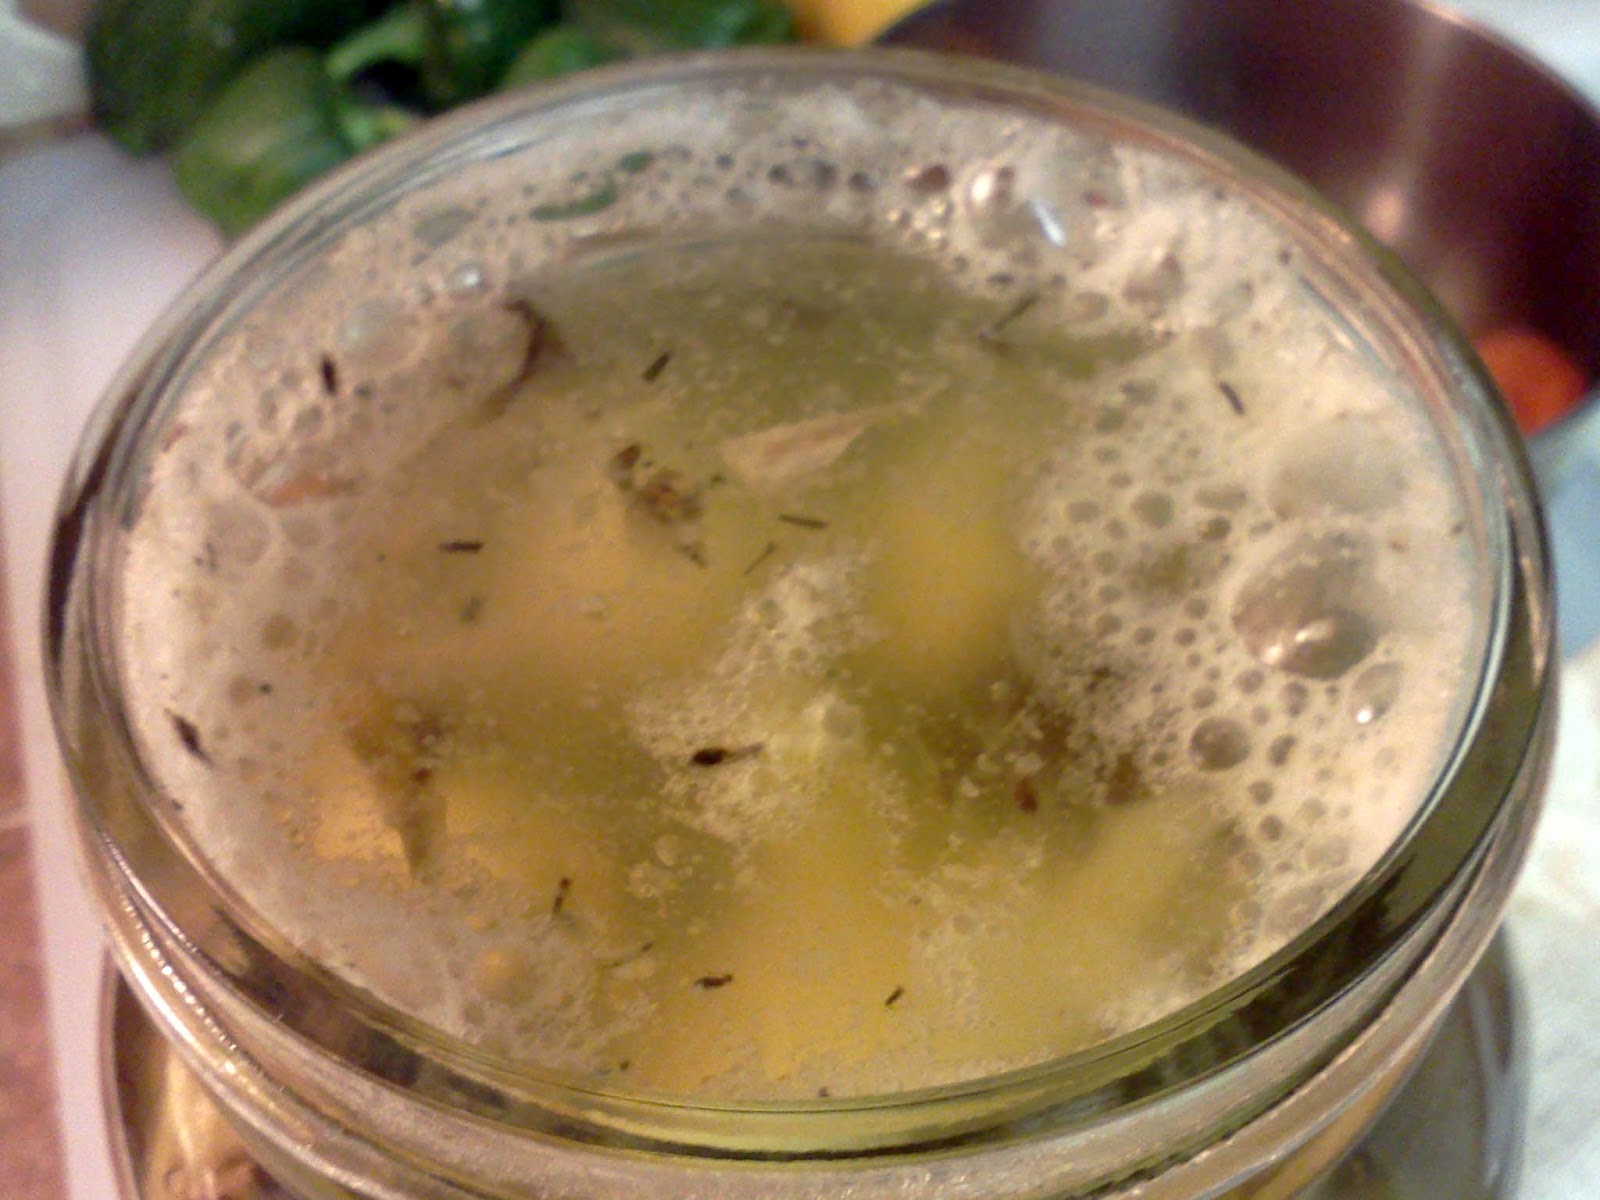
Here's what the jar looks like after around 30 hours sitting in the cabinet when I took it out to stir and incorporate air in. It's definitely starting to have a bit of a vinegary scent, but still overwhelmingly the pineapple does make itself known. Yes, it's supposed to have the nasty foam on the top as it's part of the process, so don't freak when you start seeing it on your jar.

I recently saw on a video post a woman was using the skins from her pineapple to make vinegar, so I decided to do a little bit of research. Some recipes were a little vague, but I found this one to be quite useful, so I decided to run with it.


I used three layers of cheese cloth and used a rubber band around the neck to keep out any pesky bugs. The mixture needs to breathe, so if you put a cover on, it can't. Put it in a dark place and stir it once a day to incorporate oxygen into the brew. Just be careful and remember there's no lid, so don't tip it in a quick grabbing motion or you'll be wearing a nasty brew!
You also need to realize this stuff is going to look like it's rotting in the jar, and it'll turn color before it clears back up again, so don't give up on the mix too soon!
Happy Eats!
UPDATE:
Here's what the jar looks like after around 30 hours sitting in the cabinet when I took it out to stir and incorporate air in. It's definitely starting to have a bit of a vinegary scent, but still overwhelmingly the pineapple does make itself known. Yes, it's supposed to have the nasty foam on the top as it's part of the process, so don't freak when you start seeing it on your jar.
Subscribe to:
Posts (Atom)